
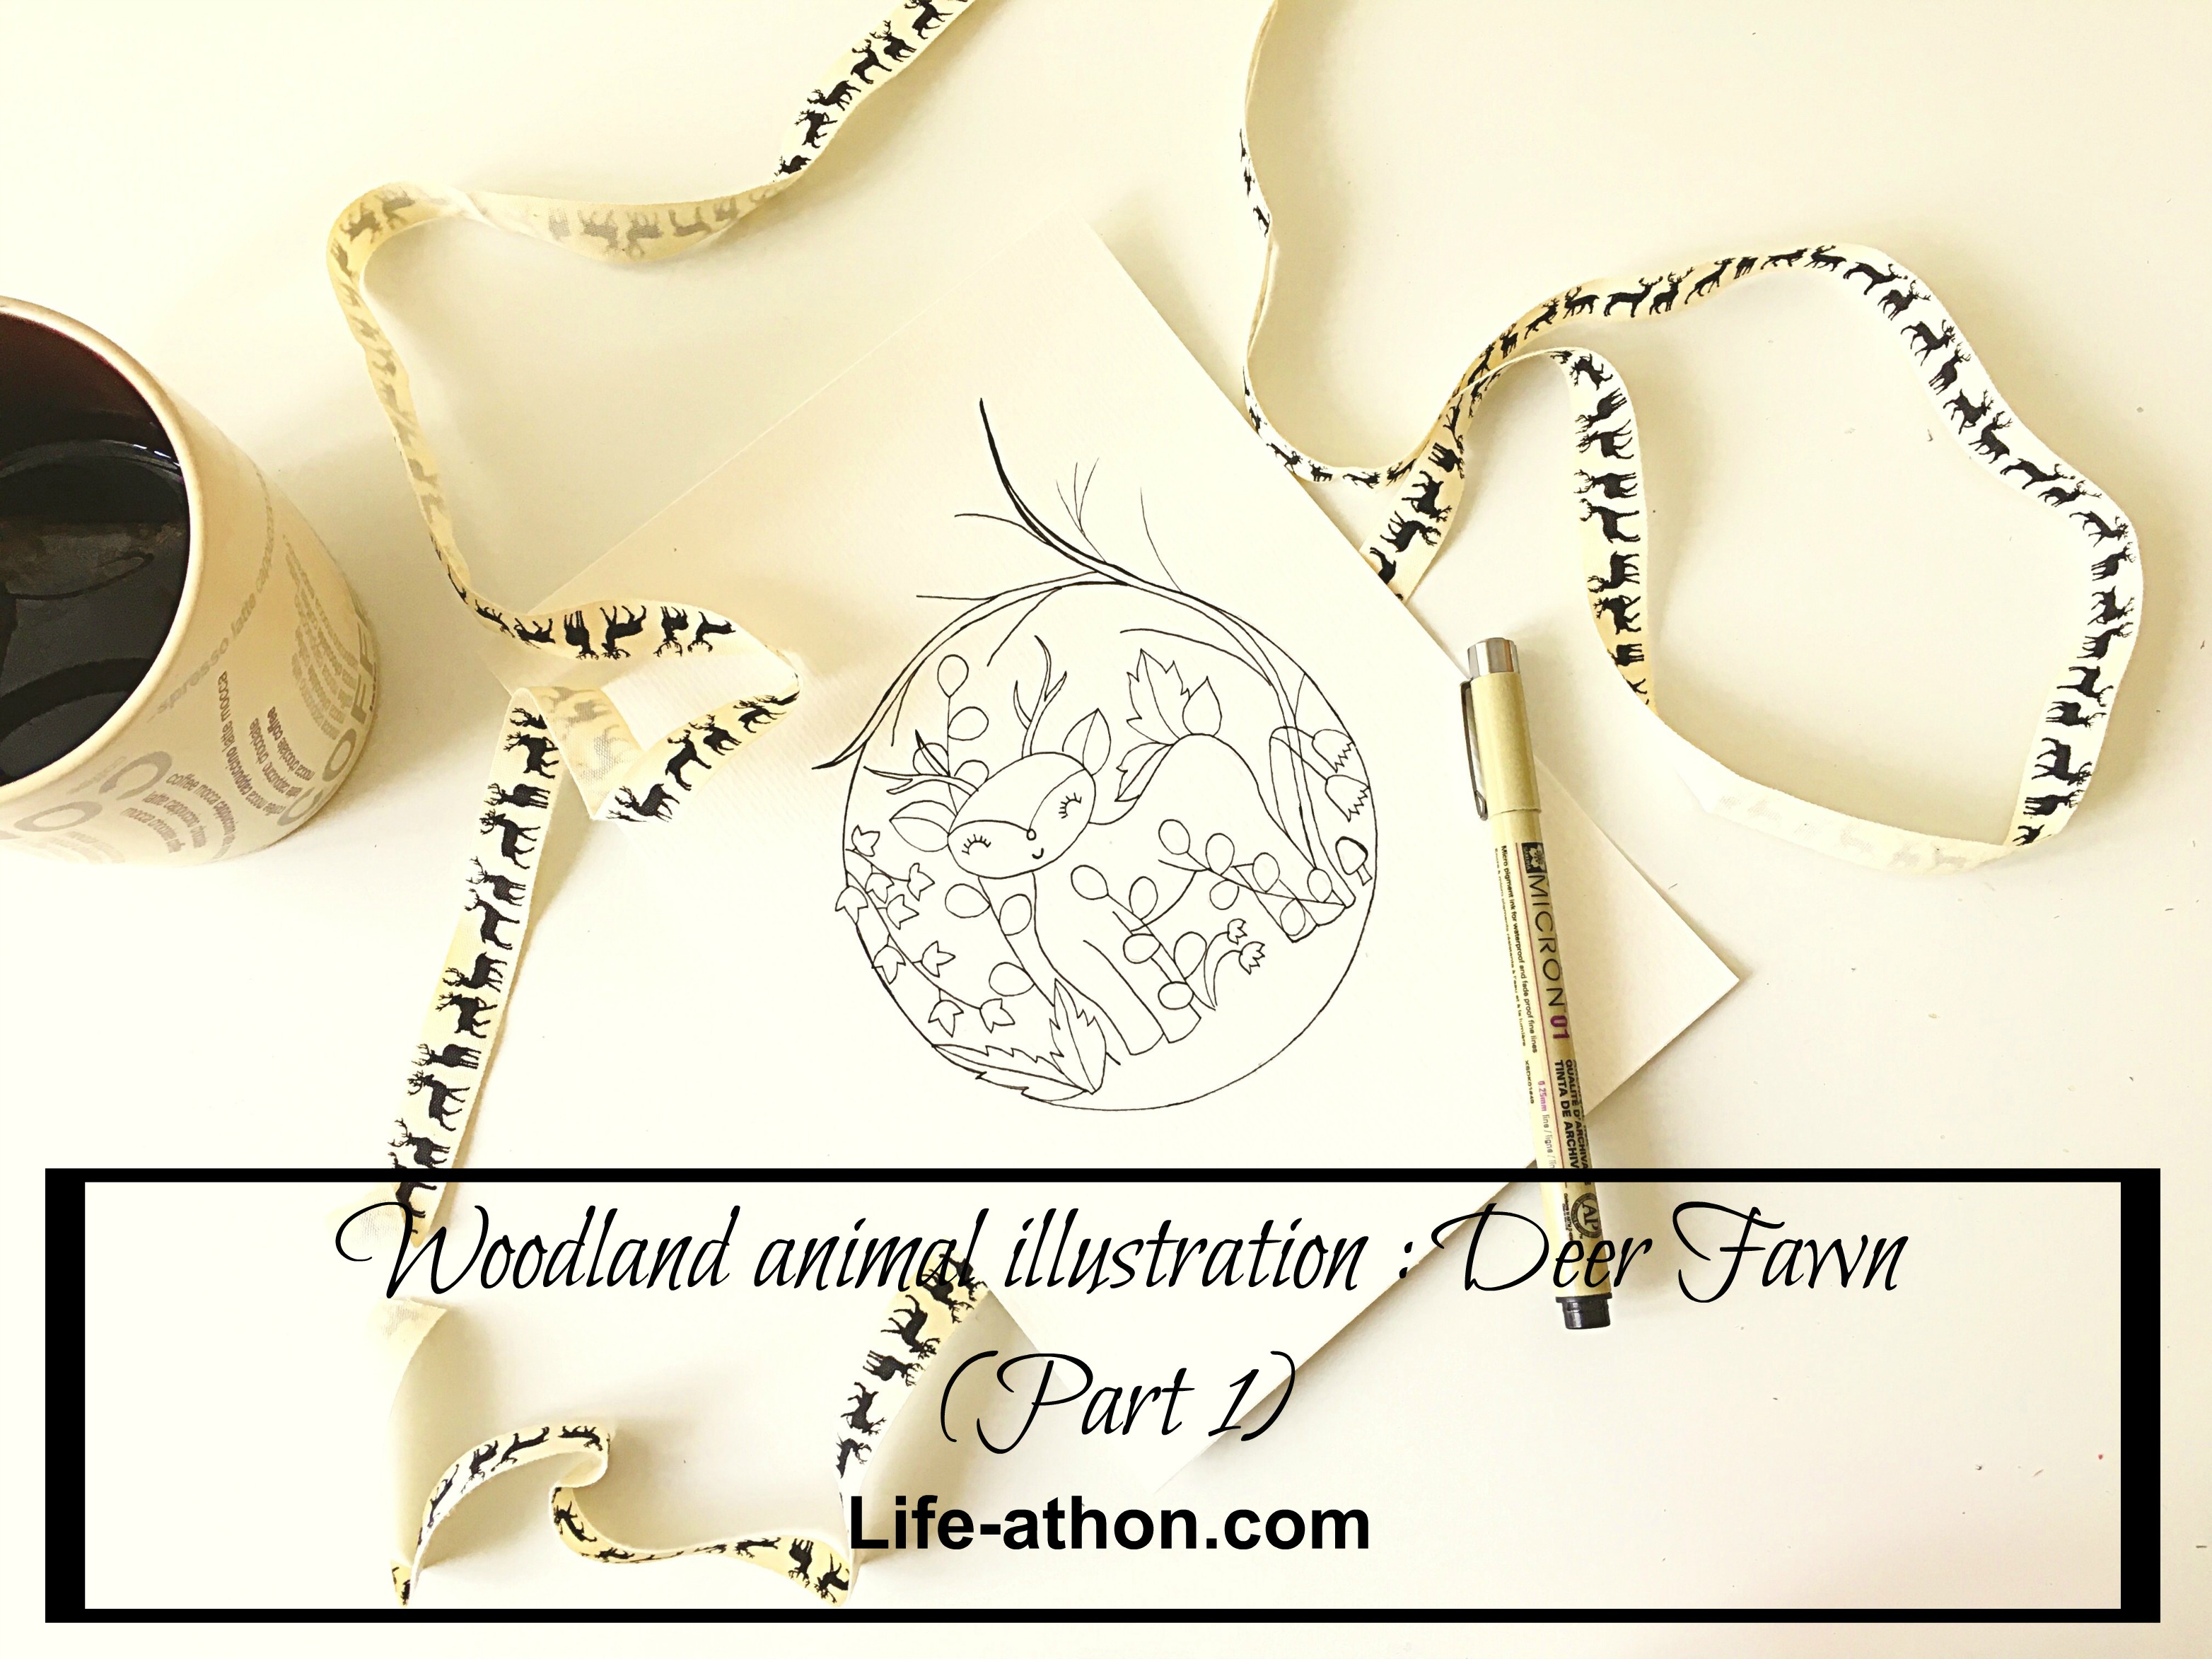
Recently I have watched a quite a few animal movies – Jungle Book, Finding Nemo, Zootopia, and Open Season to name a few and fell in love with all those cute and colorful creatures. So guess what? I am badly bitten by the animal bug and I want to re-create a cute woodland animal illustration with botanical backdrop using my inspiration from the movies I watched. Learn how to illustrate a cute little deer fawn using watercolor in today’s easy-to-follow Woodland animal illustration tutorial.
Deers fawns are one of my favorite in the animal kingdom simply because they are so cute, shy and agile creature. I made this watercolor illustration thinking of spring in the woods and it’s wonderful vibrant hues.
Supplies
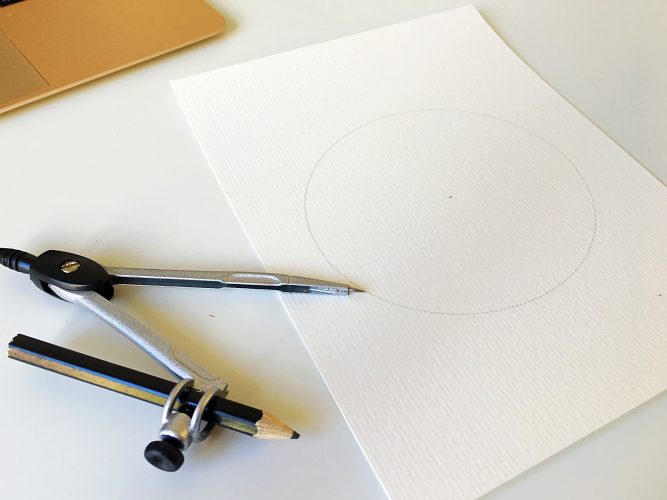
- Watercolor paper ( I used a A5 Size of paper, feel free to use any size)
- Pencil
- Compass or anything circular
- Watercolor paints
- Brushes
Steps
I have divided the steps into two part : Drawing and Coloring as the tutorials are very detailed. Part 1 features the drawing and sketching of the woodland deer fawn in detailed steps and video tutorial. Part 2 features the coloring guidelines for the Woodland animal illustration. For those who prefer to only add colors to the illustration, can skip the initial drawing part and can download the woodland deer fawn coloring page (Size A5) for free at the end of this tutorial and experiment with colors until the coloring tutorial next week.
Part 1 : Drawing
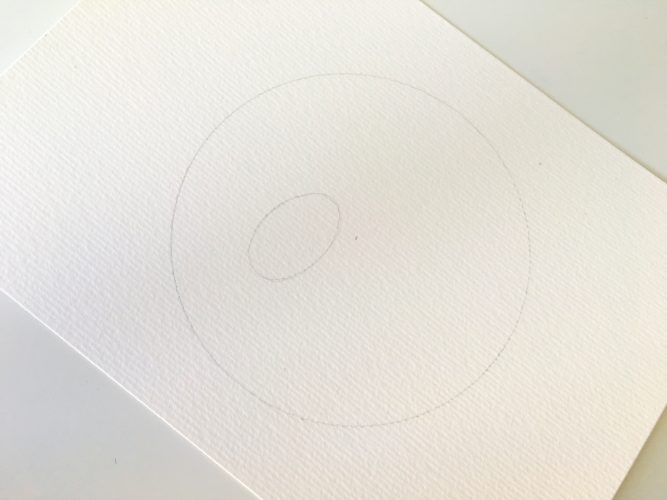
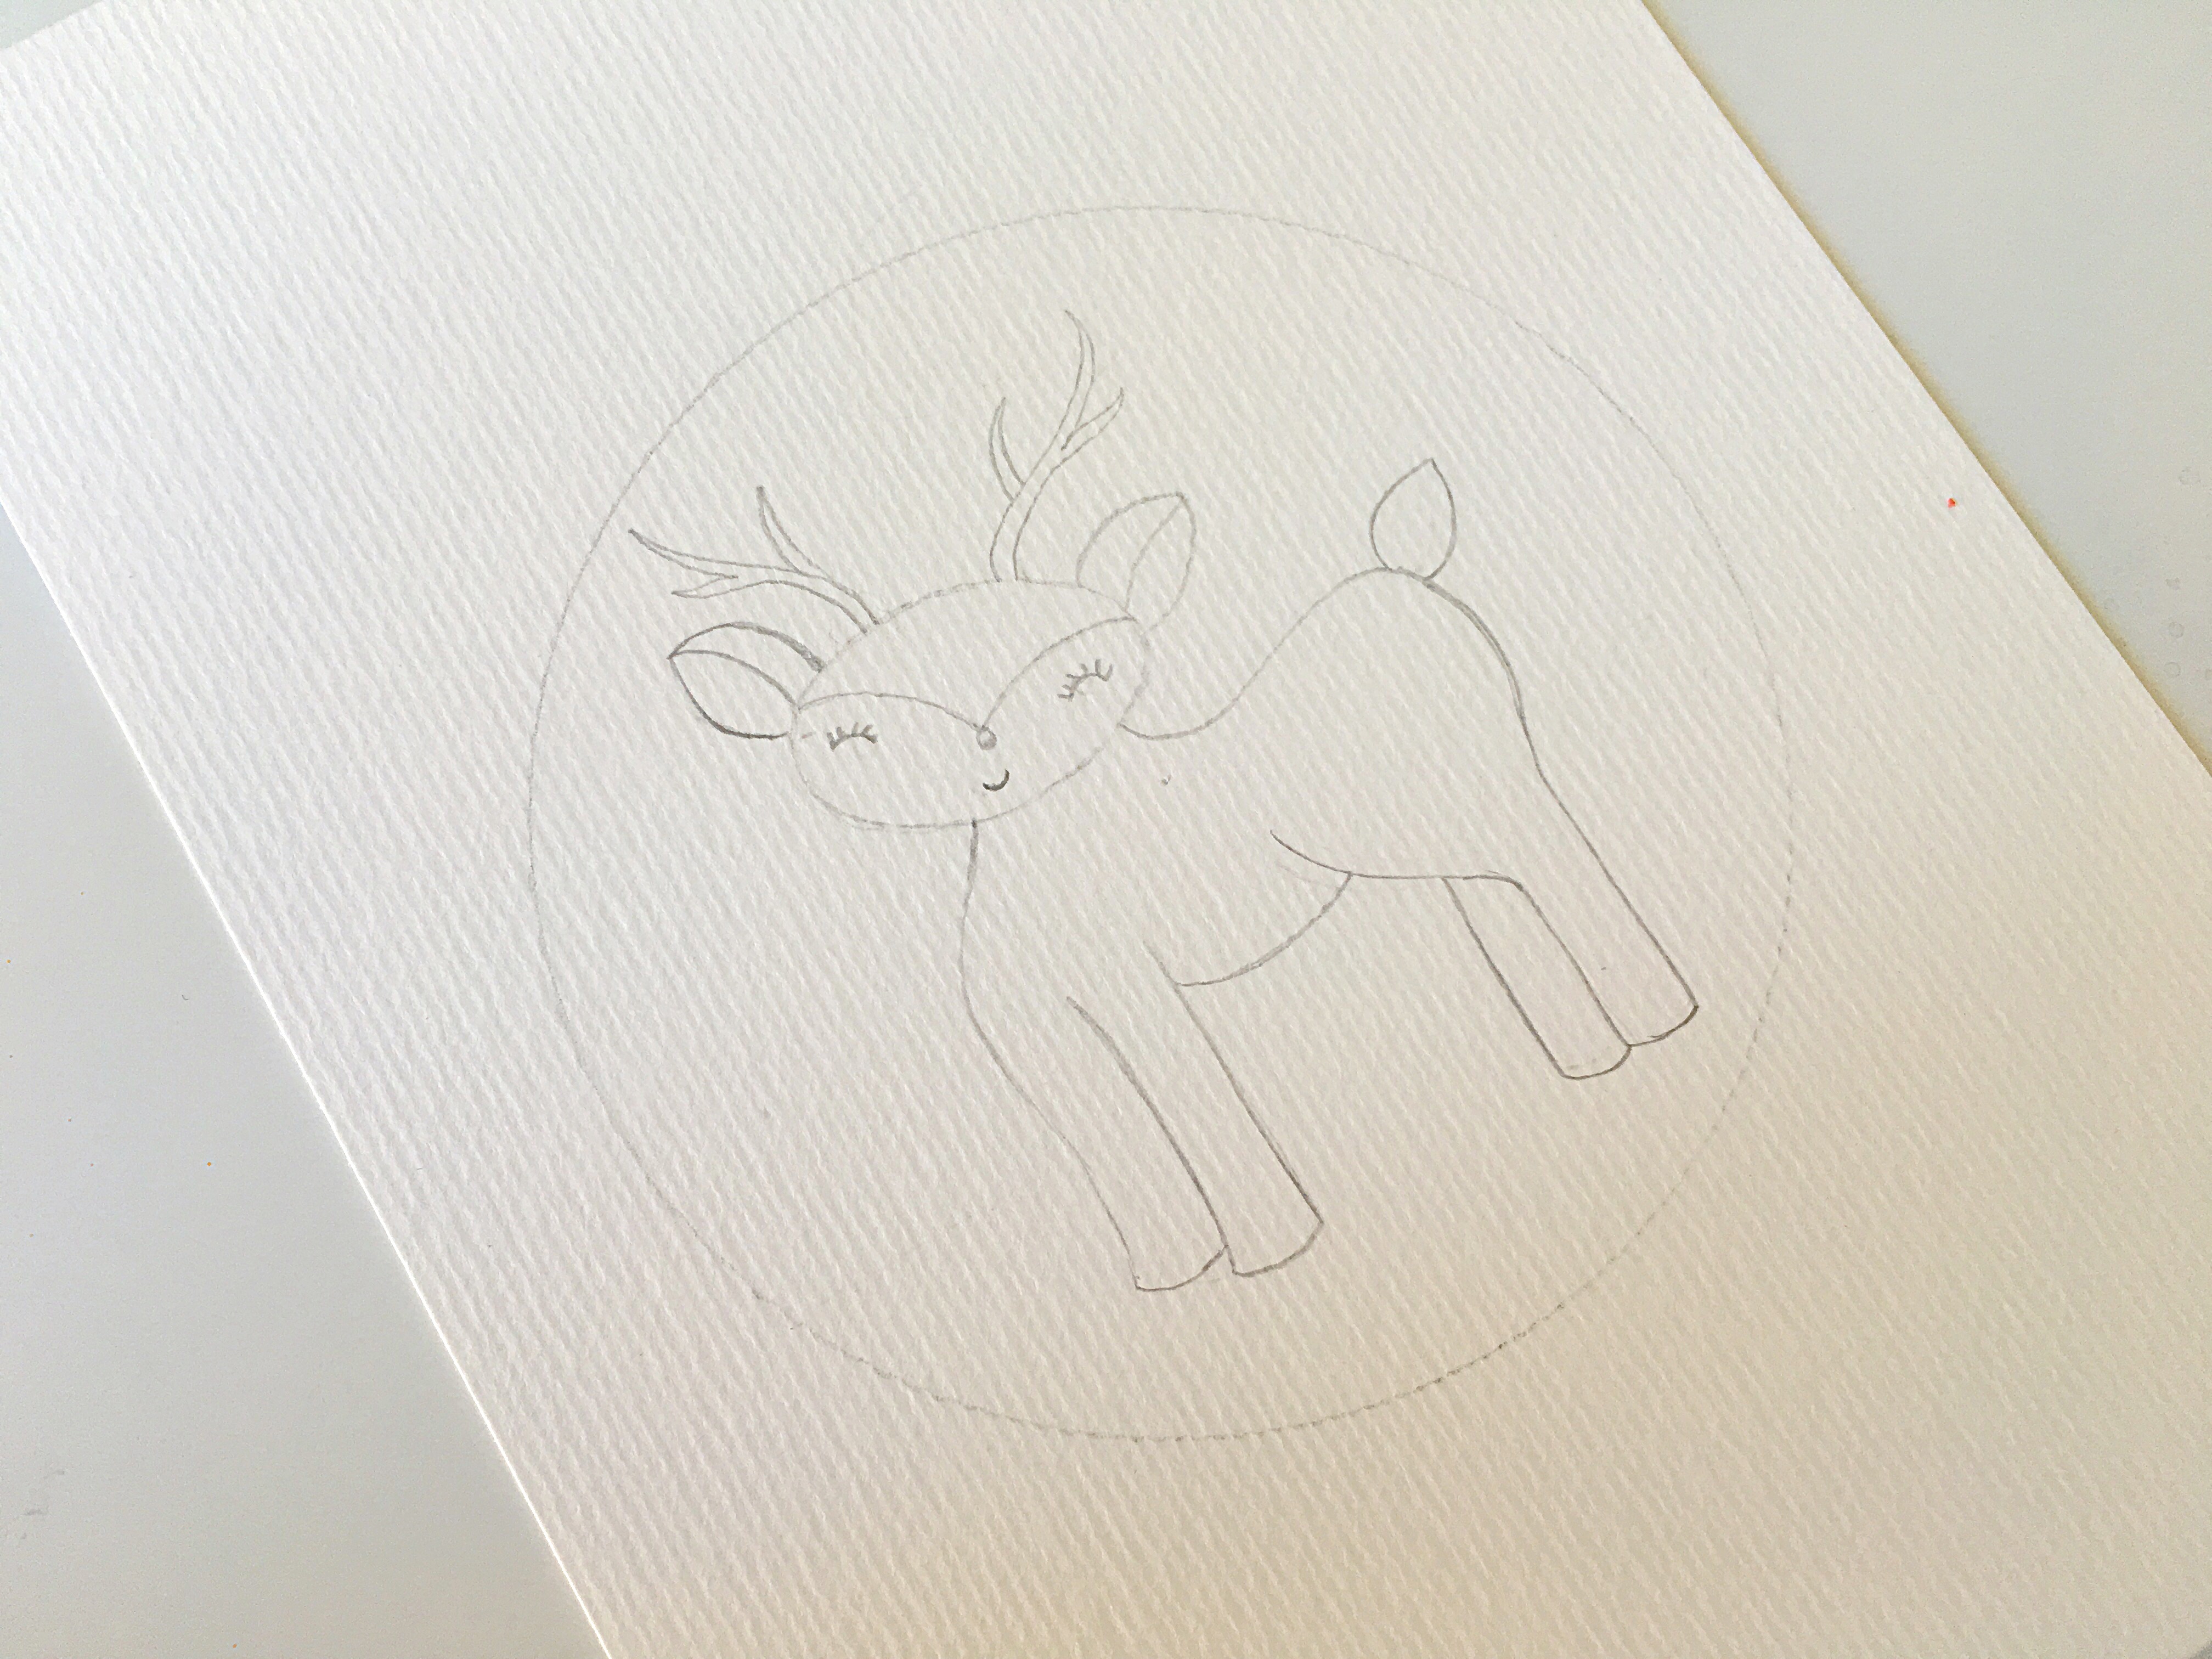
Find the center point of the paper and draw a circle using a compass or a circular object like a lid. The inside of the circle will be your workspace.
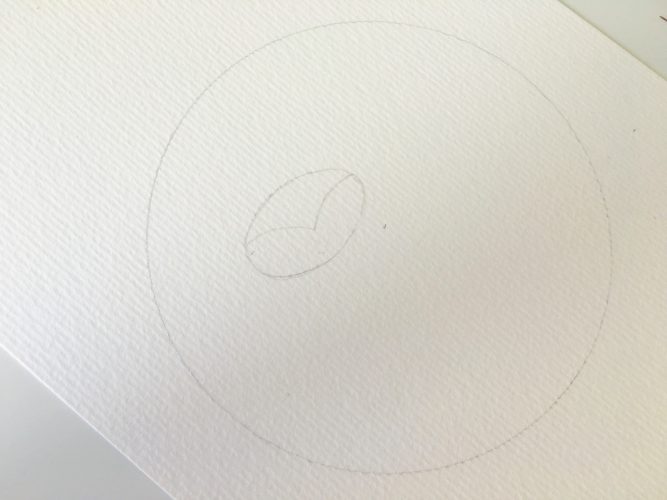
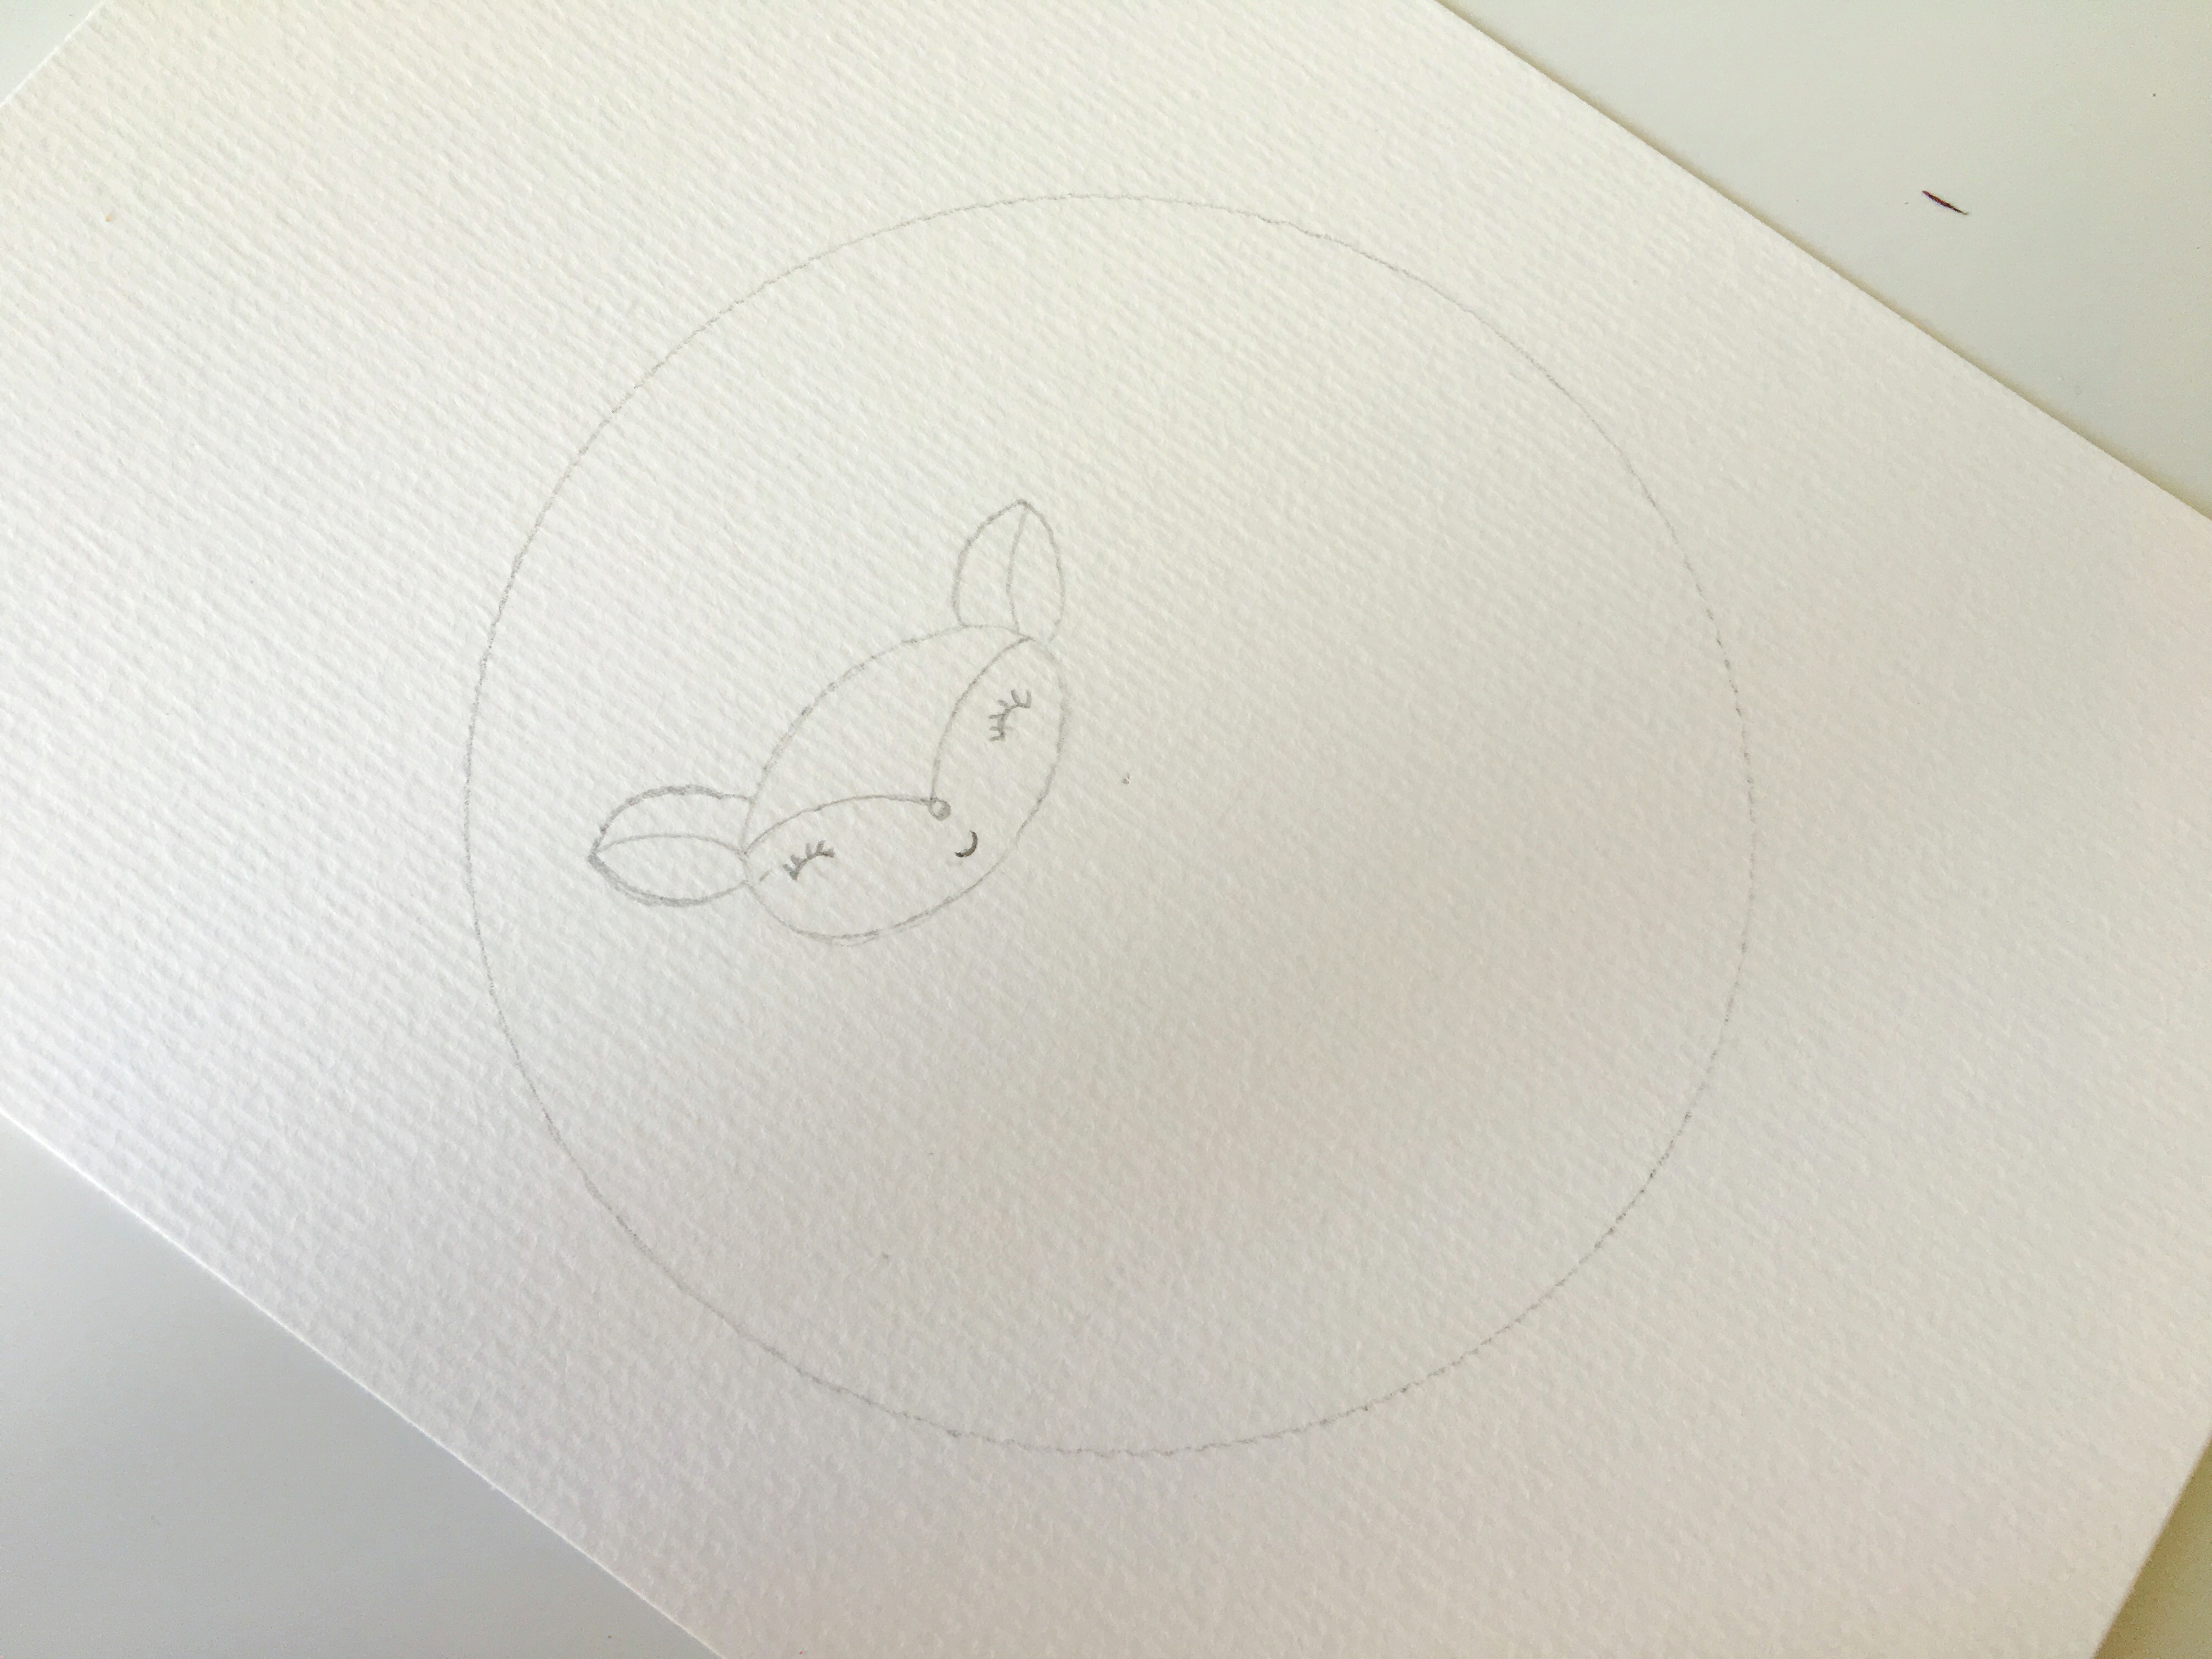
Let’s us begin by creating a small oval inside the circle as shown below.
Now draw a Wavy V shape inside the Oval.
Add further details such as eyes, nose and cute little lips. You already have the cute little face.
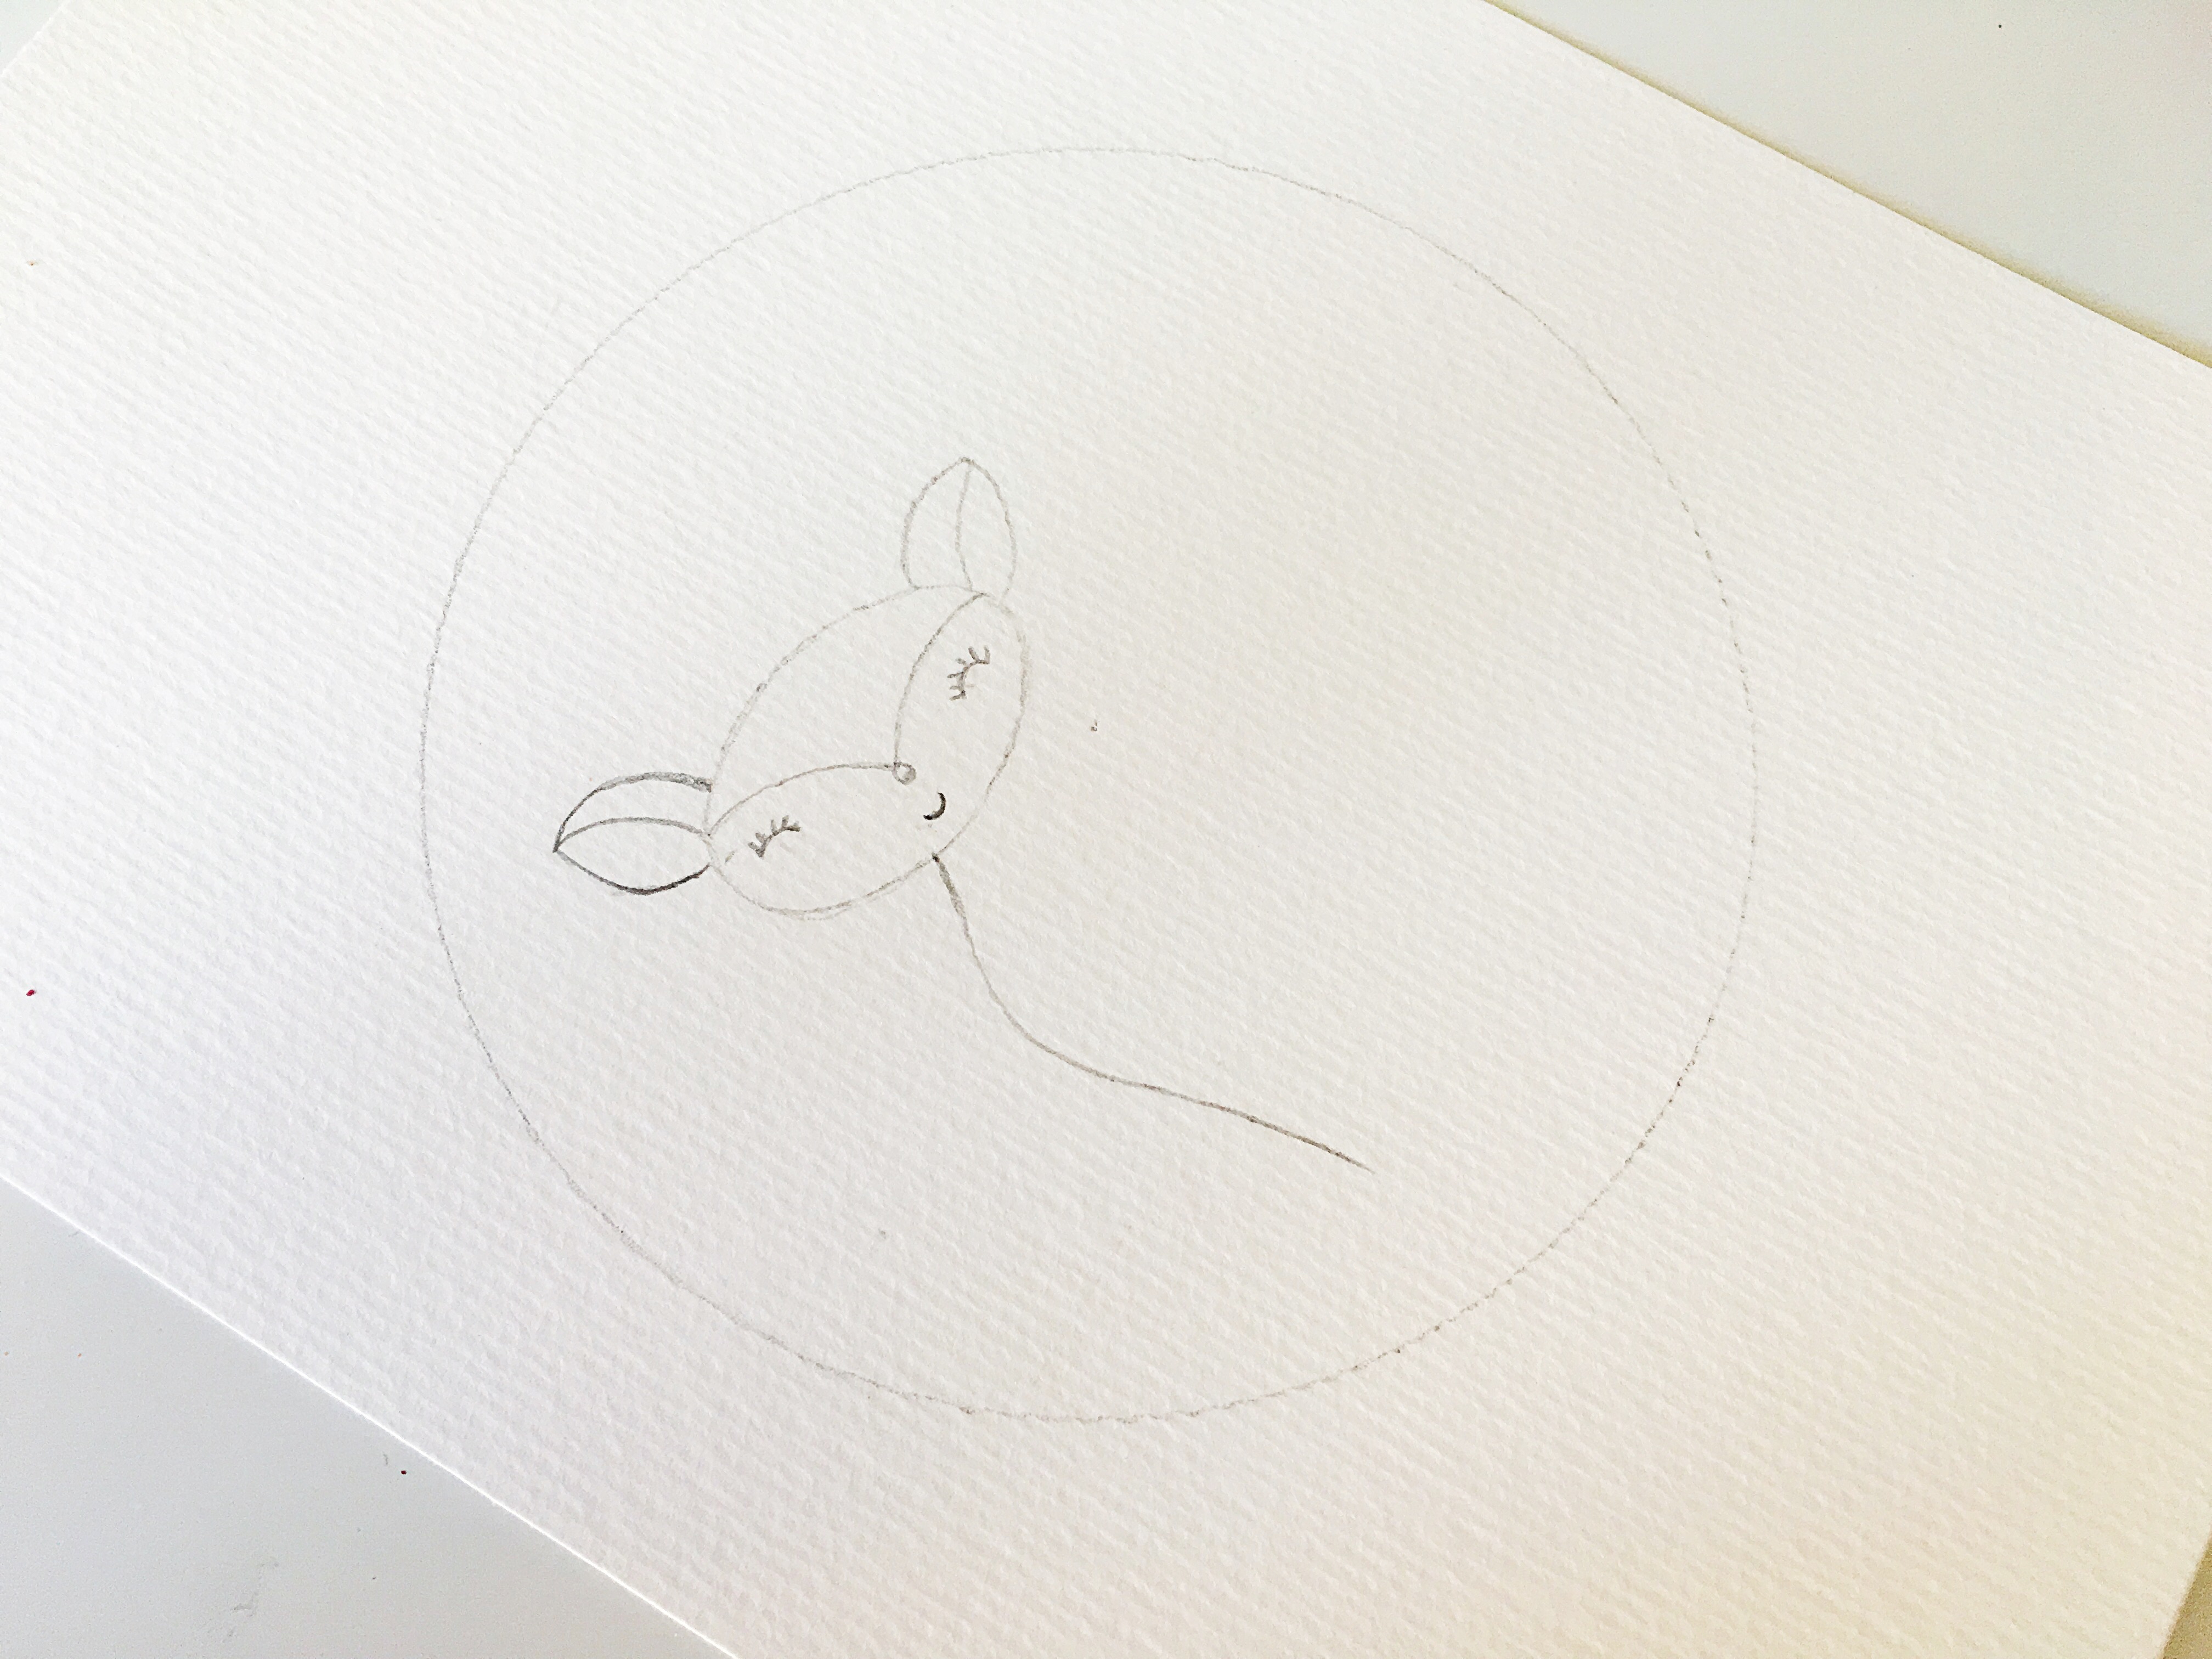
Now, we move on to the body of the deer. Start by drawing a semi-curved line emerging from the left chin of the deer fawn. Extend the illustration by drawing two straight lines parallel to the semi-curved line and join them at the base. This will be the forelegs.
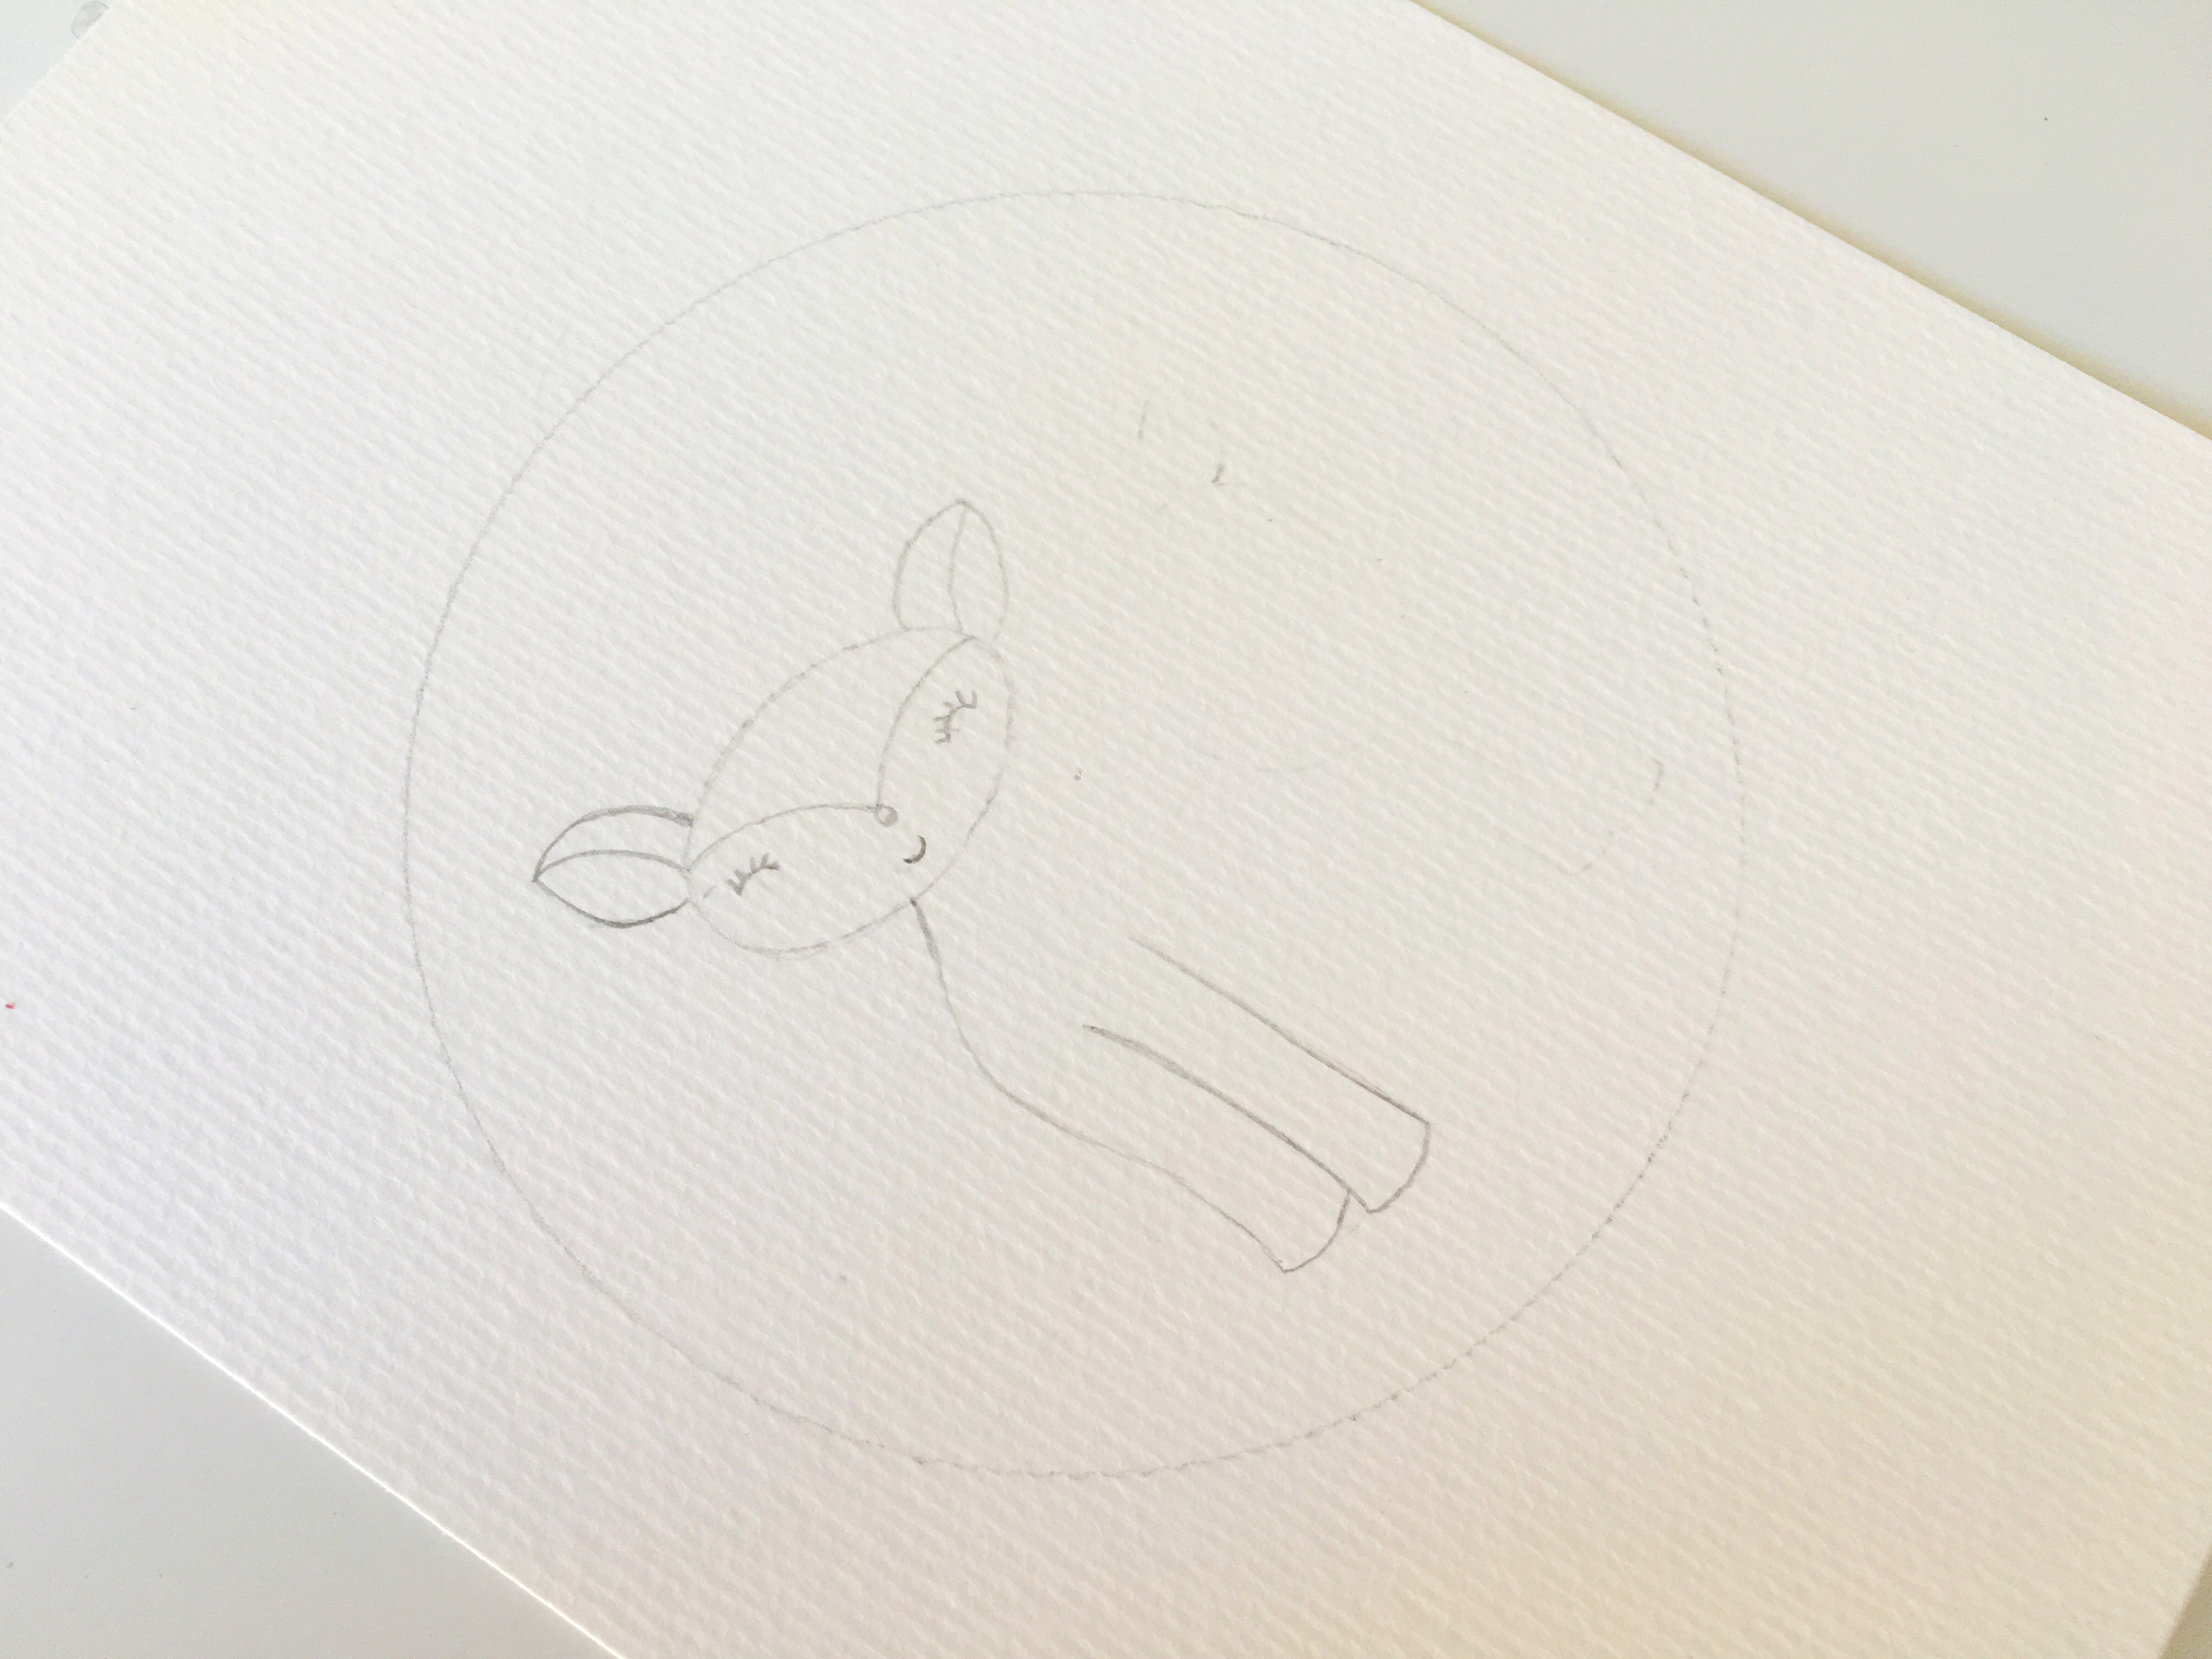
For the back and the hind-legs, start by drawing a horizontal S shaped line emerging from the right chin of the deer and further extend it perpendicular straight until you reach the base of the legs.
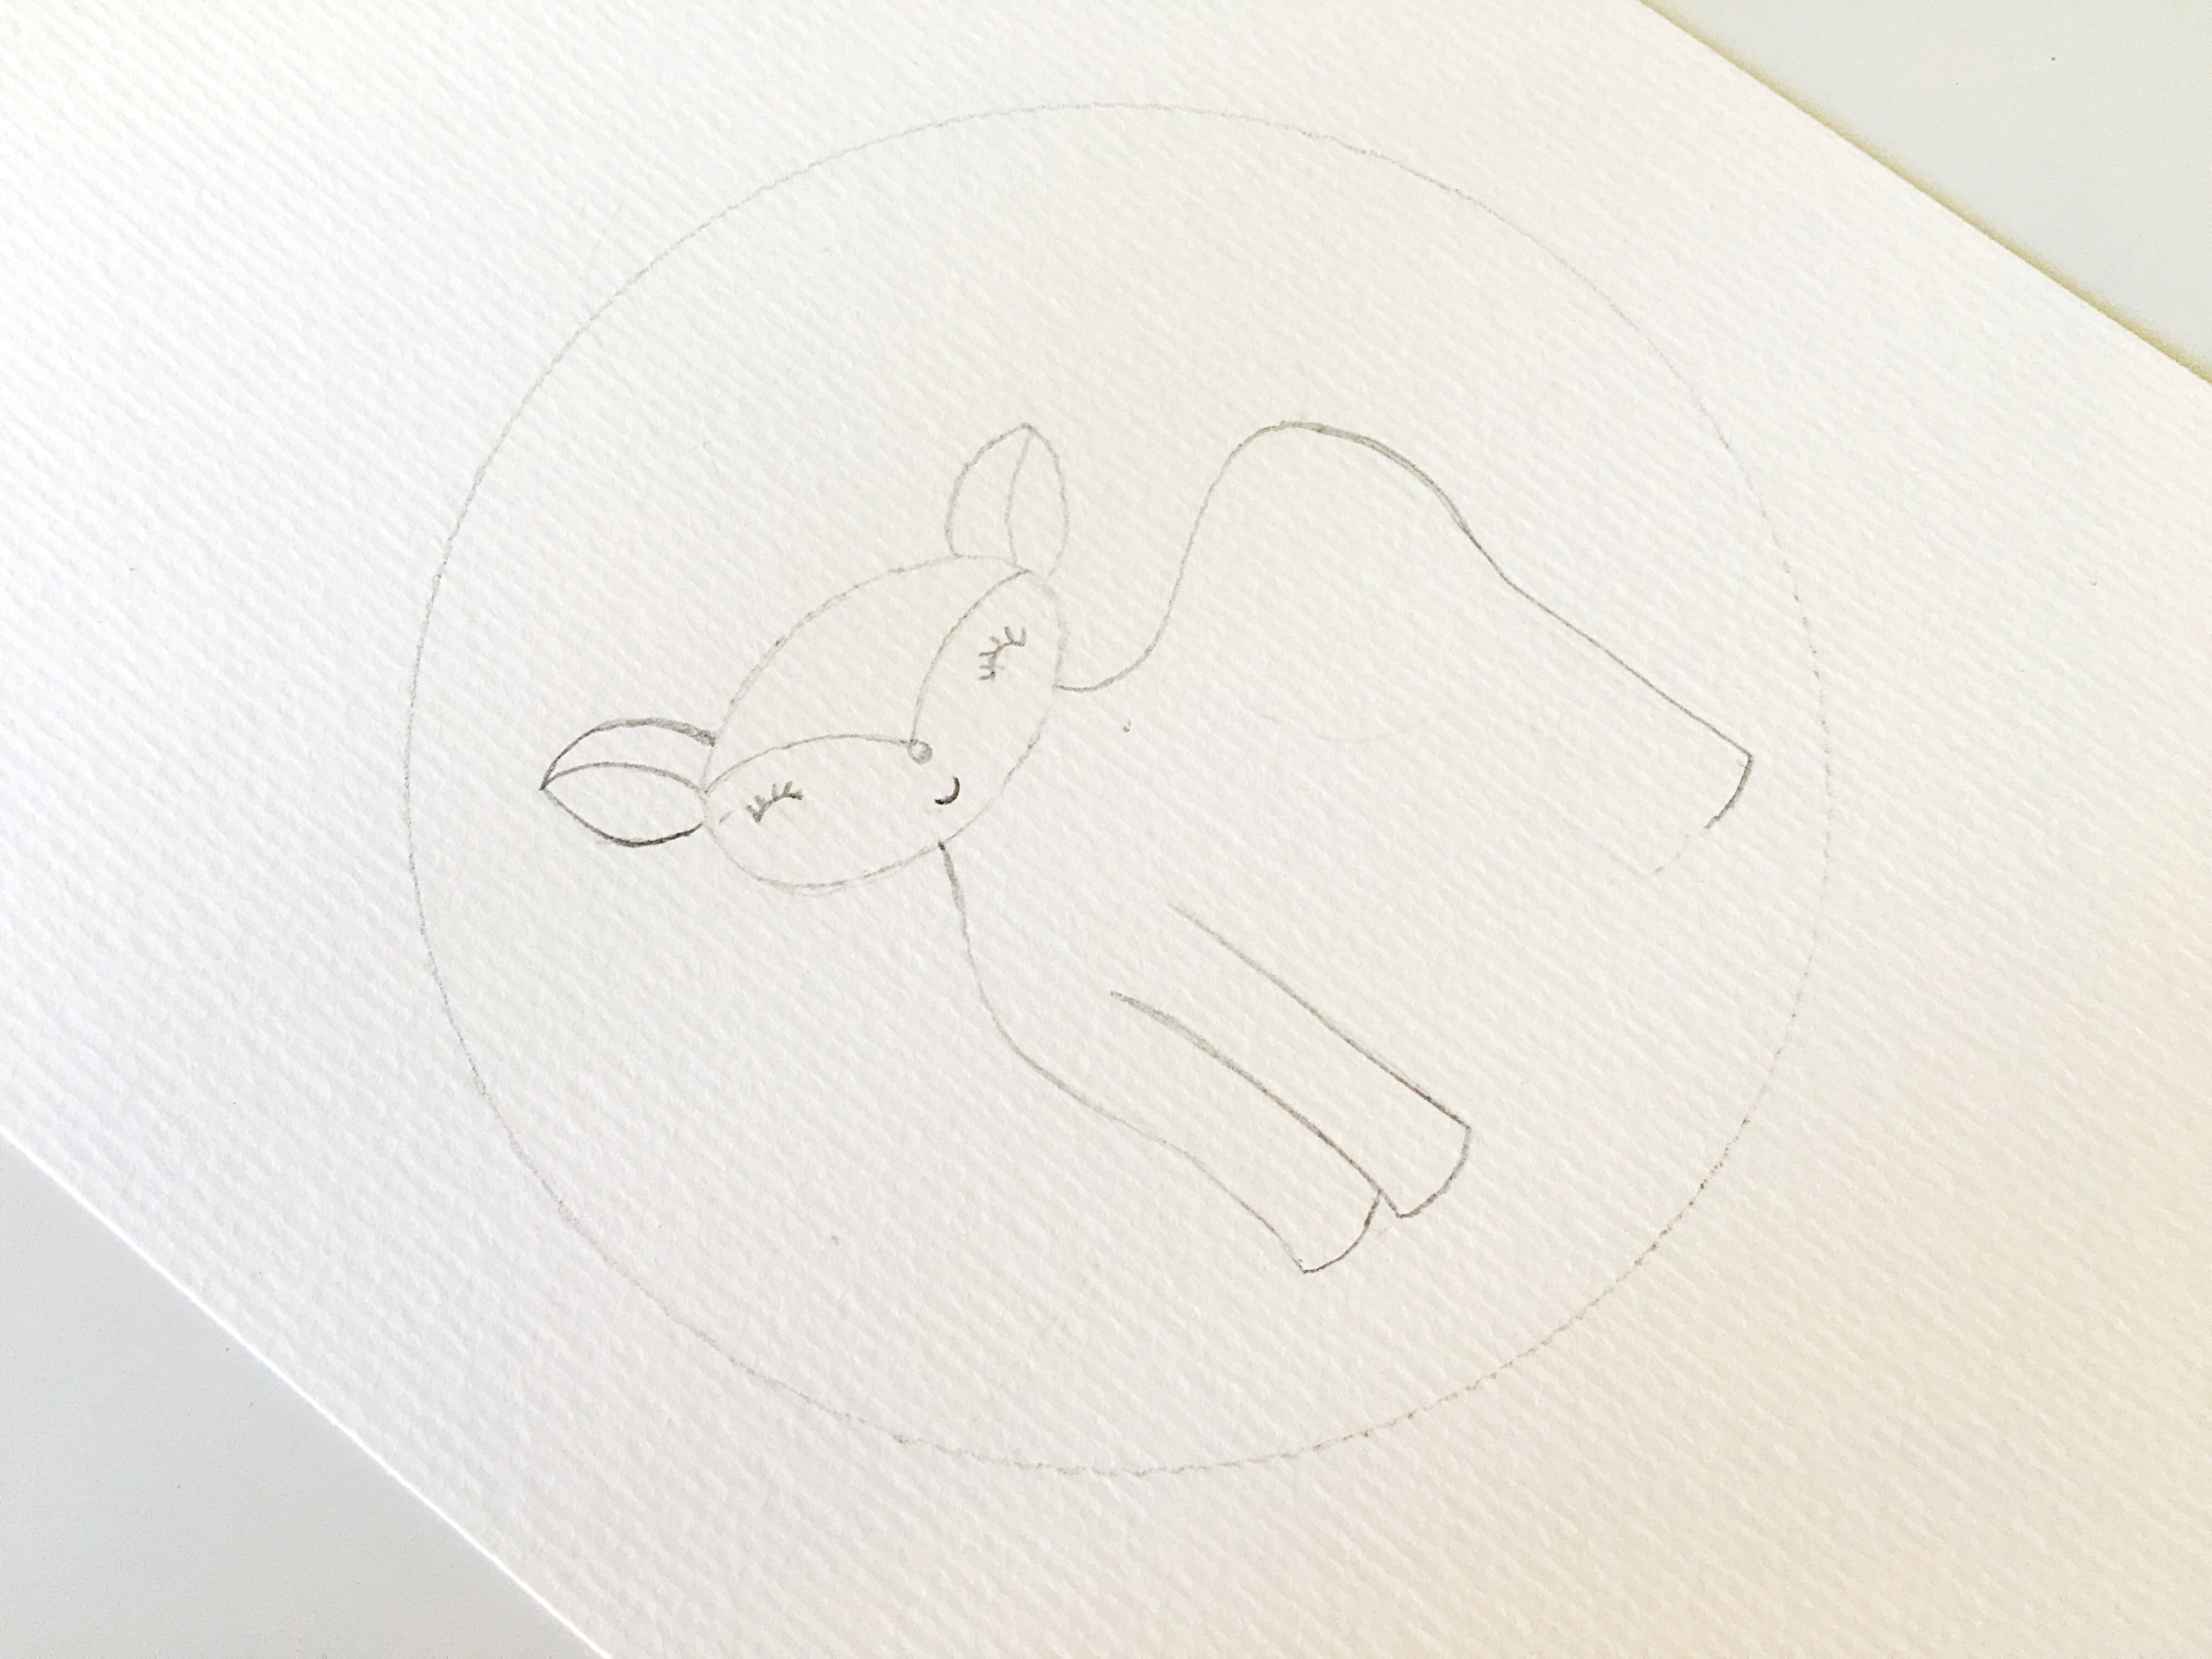
Now draw a parallel leg and join the fore and back legs as shown below.

The antlers are optional. And Voila! A cute little bambi ready to be colored. But before that let us add the botanicals and florals.
You can either opt to keep it simple and create a floral wreath around the deer fawn by my botanical-wreath tutorial. If you have an eye for detailing, you can furthermore go ahead and create a rough sketch of woodland by add elements such as leaves, berries, mushrooms, flowers etc . Isn’t this woodland animal illustration so adorable?
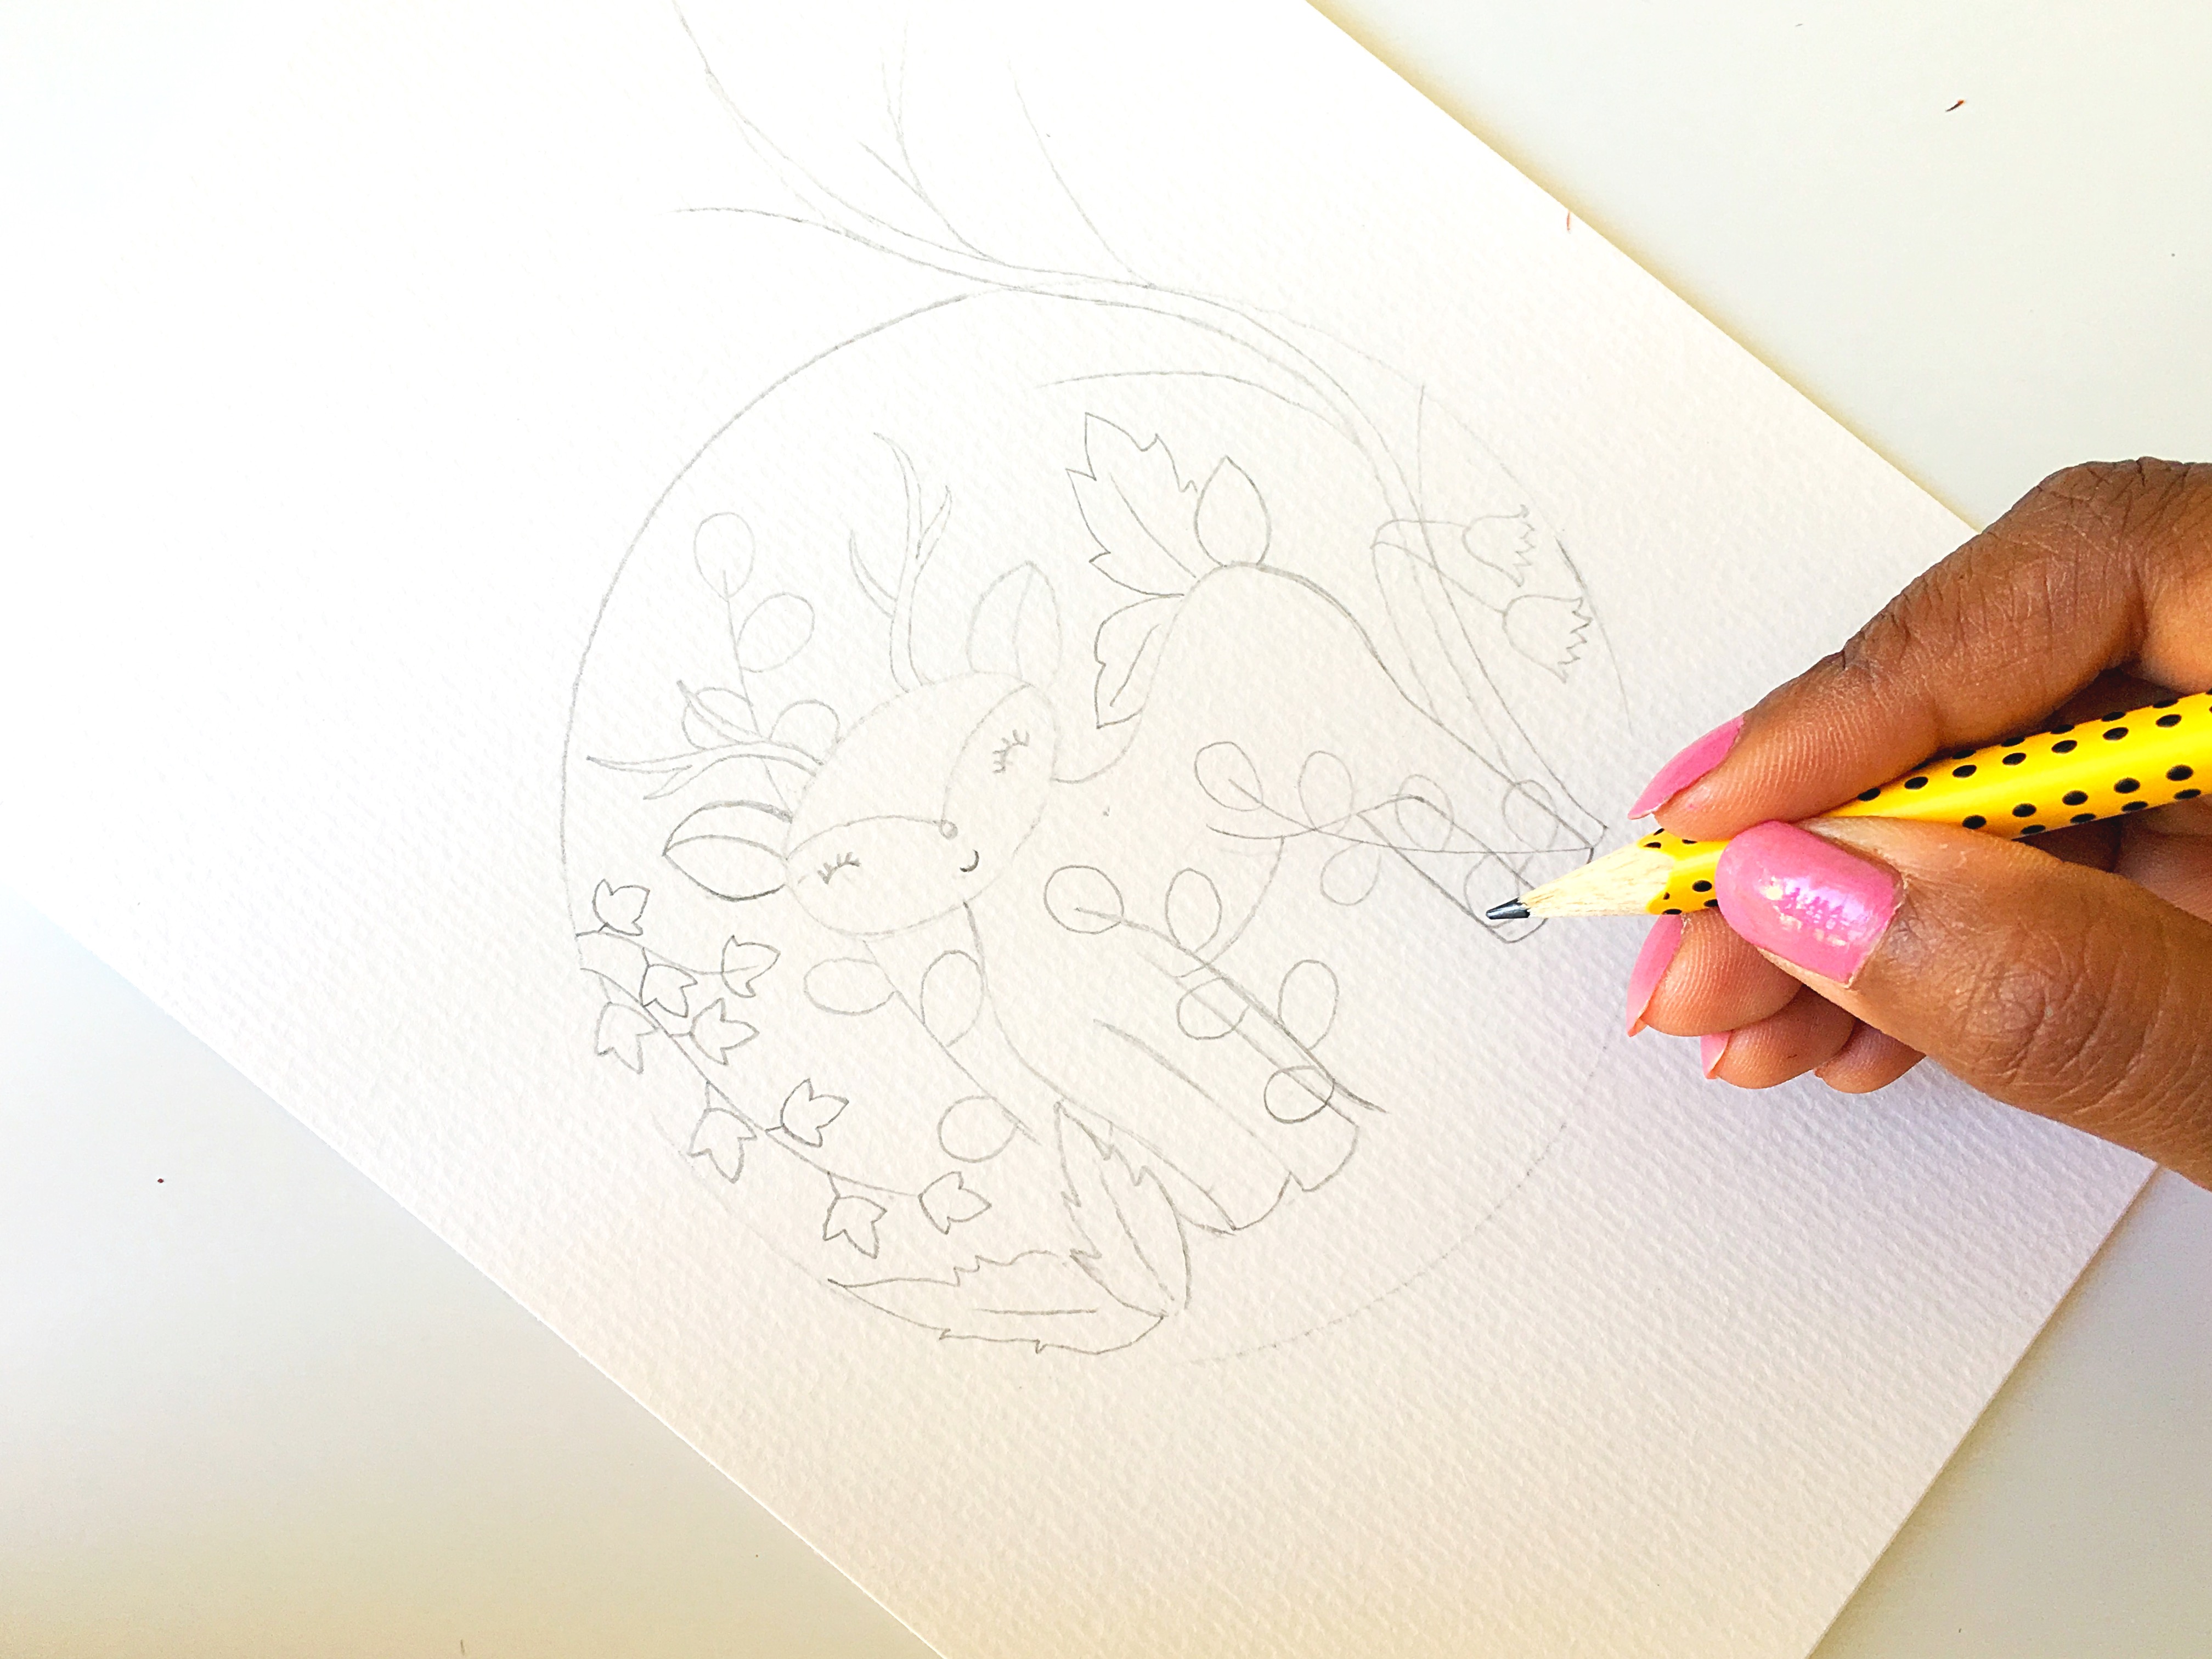
I went over the pencil lines with my Micron pen and captured the process in a small time-lapse video for you. Have a look!
Download
For those who just wish to color the Woodland animal illustration can download the sketch by clicking on the link below and experiment until next week.
woodland deer fawn coloring page

This woodland animal friend is perfect for DIY invitations, kids projects, party decoration, posters, scrapbooking, web design and baby cloths as well.
Check back next week to learn to how to paint this beautiful illustration. I hope my today’s tutorial inspired you to grab you pencil and pen and start to sketch. Please share your project with me in my instagram and #Lifeathonblog.
Happy creating!
Cheers

One thought on “Woodland animal illustration tutorial – Part 1”
Comments are closed.